ETStudio插件
##前置依赖
- Visual Studio 2022
- Git命令行工具
- 祥宇VPN连接
- DevExpress 23.2.5
-安装包下载地址:
http://1.94.108.133/data/DevExpressComponentsBundleSetup-23.2.5.exe.zip。 -您可以先使用试用版本进行开发 - ETStudio上位机软件:从http://1.94.108.133/data/develop/ 下载名称类似'EtStudioInstall-v2.0.0_202505201819_develop2afbd8d.exe'的最新版本,然后安装
##项目配置
1.下载演示库
- 项目地址:http://1.94.130.228/prod_dev/etstudio-demo。
- 使用Git下载
cd c:\prod_dev-使用命令git clone git@1.94.130.228:prod_dev/etstudio-demo.git获取Demo示例项目
2.调试演示库
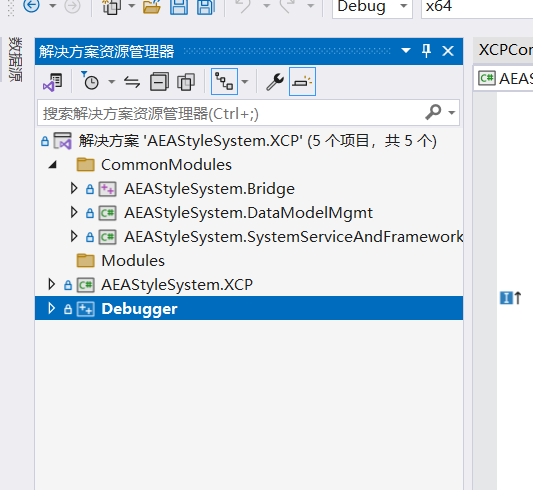
- 使用Visual Studio 2022打开'C:/prod_dev/etstudio demo/ETStudio.Demo.sln'项目。打开时项目应具有以下结构:
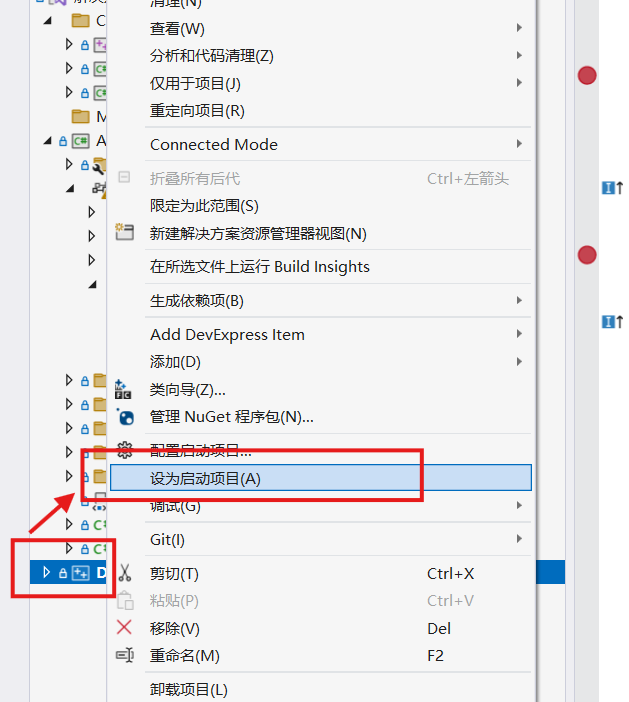
- 右键点击debugger项目,将debugger设置为启动选项
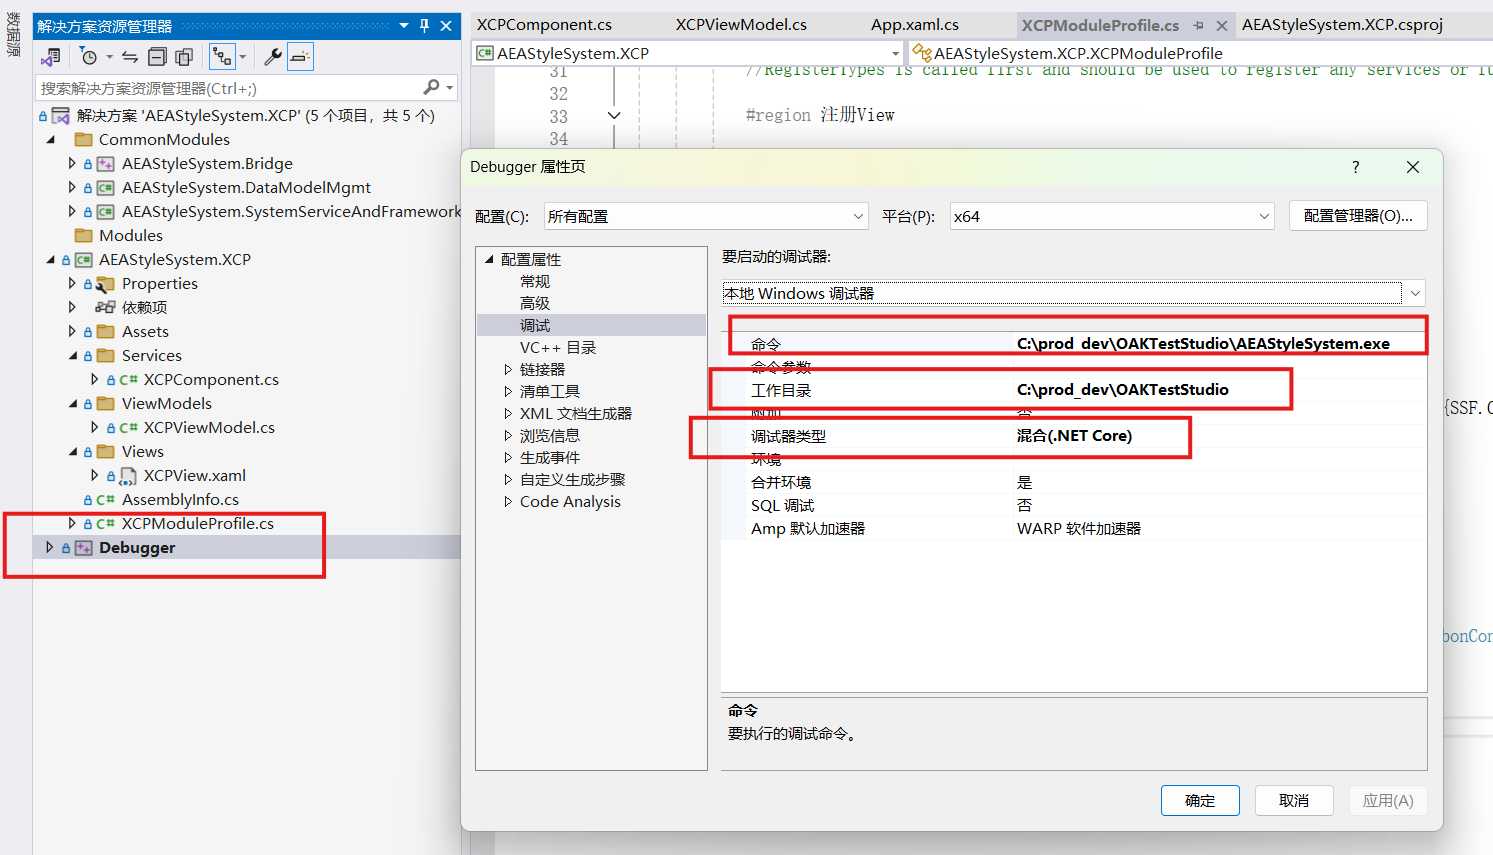
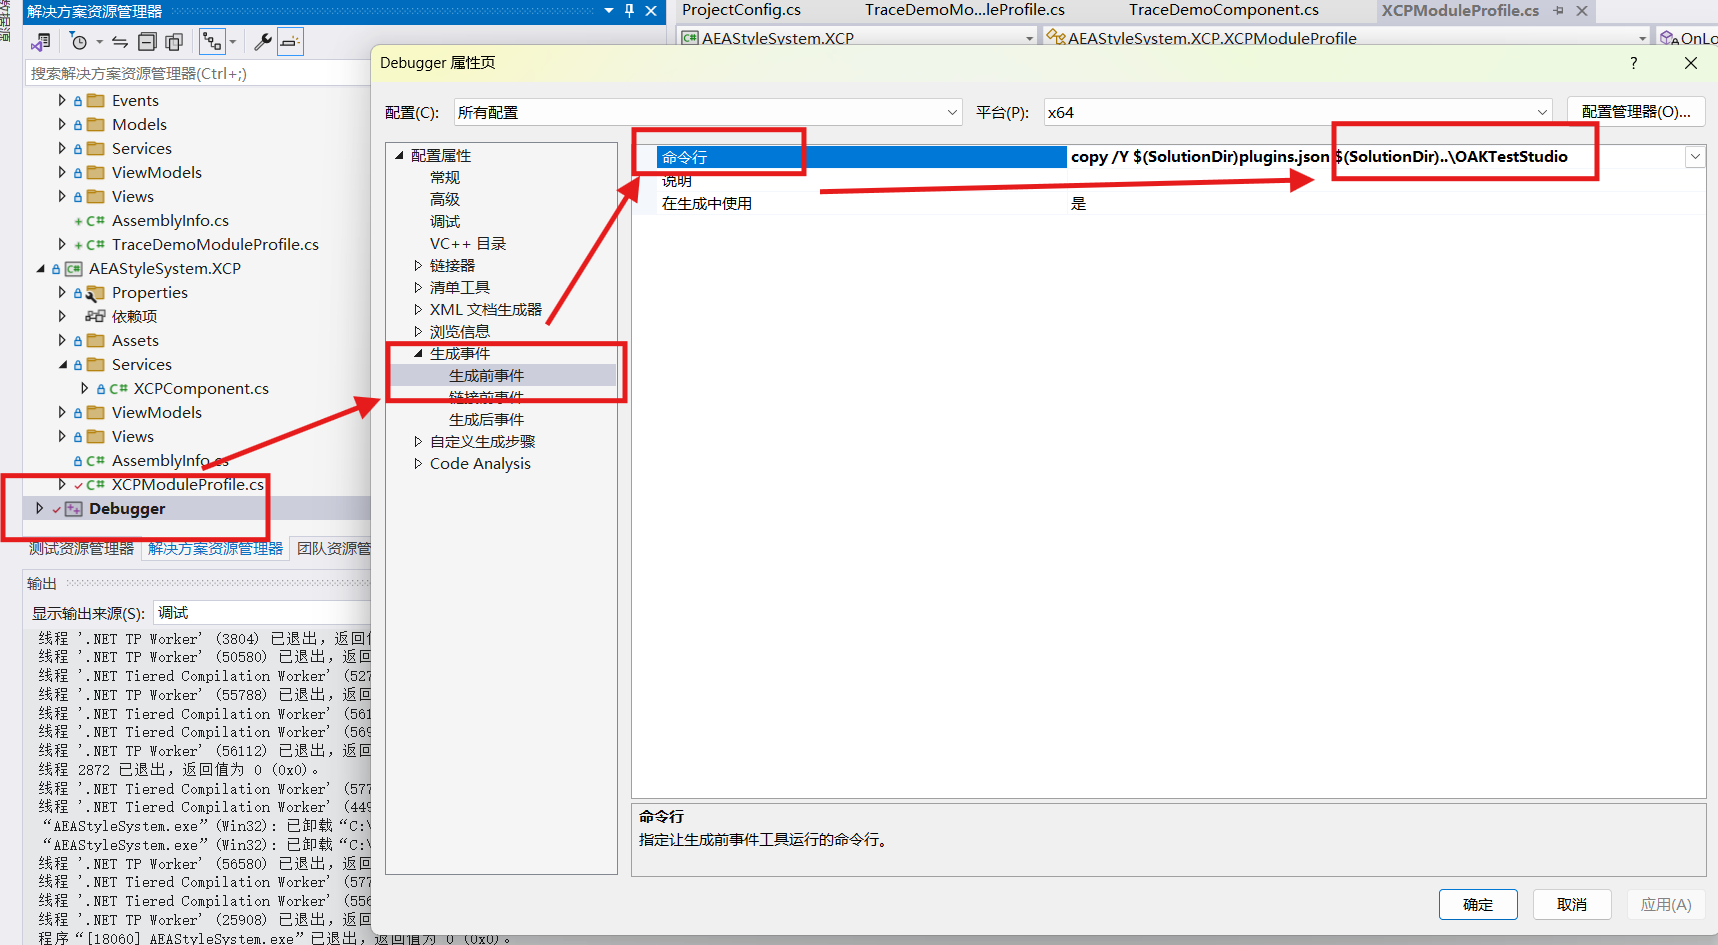
- 右键点击debugger项目,选择属性>配置属性>调试>命令设置为
C:\Program Files\XYuAuto\ETStudio\ETStudio.exe,工作目录设置为C:\Program Files\XYuAuto\ETStudio\,调试类型设置为混合(.NET Core)。如图所示:
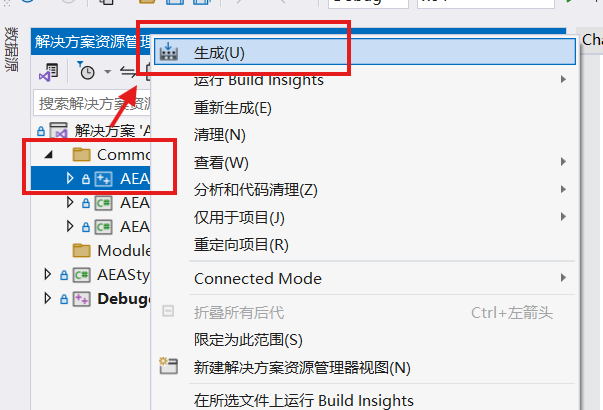
- 右键点击debugger>生成或重新生成来构建XCP项目
- 配置上位机加载演示库
-使用文本编辑器打开
/Plugins.json文件,参见[7.plugins.json结构介绍] - 将
/Add plugins.json复制到C:\Program Files\XYuAuto\ETStudio目录,以便在运行时在上位机上加载Demo模块
- 将项目配置为x64并点击运行进行调试
 ##开发要求
- UI基于C# WPF开发
- 请使用DevExpress作为UI控件,除非DevExpress中没有可用的控件
- 请在演示界面的所有文本中统一使用英文 ##开发指南
1.界面
- 界面应在Views目录中定义
2.数据
使用的数据结构应在Models目录中定义
3.将界面交互逻辑放在ViewModels目录中
4.协议逻辑
- 协议和其他逻辑应放在Services目录中
5.基础模块向Demo提供的接口说明
- 获取当前时间的接口-已实现
GetTimestamp_us()
- 高精度定时器-已实现
Public void OnTimer10ms (UIEnt32 timerID)//高精度定时器回调(OnTimer10ms将每10ms被调用一次,除非调用StopTimer,注意:此函数在线程上执行)
{
StopTimer(timerID);//关闭高精度定时器
}
StartTimer(10, OnTimer10ms);//设置10ms高精度定时器
CAN消息的传输可以通过Bridge.BridgeManagement提供的'SendCanTransmit'接口实现
2. 在参考public override bool EmplaceBusEvent(Bridge.FrameWrapper frame, bool newFrame)中处理消息。
3. 系统变量的CURD
4. 查询上位机上Channel Mapping的配置信息
5. 消息解析底层接口说明:
-代码示例:
public override bool EmplaceBusEvent(Bridge.FrameWrapper frame, bool newFrame)
{
var name = frame.Name;
var description = frame.Description;
var xcpCmdID = frame.xcpCmd;
var xcpCmdUuid = frame.xcpCmdUuid;

var parameterCount = frame.ParameterCount;
for (int i=0; i< parameterCount; i++)
{
var value = frame.GetParameter(i);
if (value is byte byteValue)
{
Debug.WriteLine(byteValue);
}
else if (value is UInt16 value16)
{
Debug.WriteLine(value16);
}
else if (value is UInt16 value32)
{
Debug.WriteLine(value32);
}

}

var cmdFrame = GetFrame(xcpCmdUuid);
}
7.请在此处补充您的其他接口需求
Bridge.EM_CANSendFrame_t_wrapper frame = new Bridge.EM_CANSendFrame_t_wrapper();
byte[] data = new byte[4];
data[0] = 0x01;
data[1] = 0x02;
data[2] = 0x03;
data[3] = 0x04;
frame.data = data;
frame.channel = 0;
frame.can_id = 1;
_bridgeManagement.SendCanTransmit(1, frame);
_XCPViewModel.CANTxt = "456";
- 在参考
public override bool EmplaceBusEvent(Bridge.FrameWrapper frame, bool newFrame)中处理消息。 - 观察变量-一旦定义了接口xcp,就可以按如下方式调用。具体实现将稍后添加
//Add observation variables to Graphics (note: the interface has been defined, but it has not yet been implemented)
var int32MeasurementVariable = CreateMeasurementVariable("ecu1", "parameter_1", MeasurementVariableType.INT32);
int32MeasurementVariable.Add(GetTimestamp_us(), 100);
int32MeasurementVariable.Add(GetTimestamp_us() + 10, 200);
int32MeasurementVariable.Add(GetTimestamp_us() + 20, 300);

//Delete observation variable
RemoveMeasurementVariable(int32MeasurementVariable);
- 上位机Channel Mapping配置信息管理-已实现
public override void OnChannelMapping(Bridge.ChannelMappingWrapper pChannelMapping, bool deleteFlag)
{
//After starting from ChannelMapping, the upper computer receives the Channel method

if (!deleteFlag)
{
if ((ETStudio.SSF.Interfaces.HardwareSvc.HwProtocalTypeEnum)pChannelMapping.ProtocalType == ETStudio.SSF.Interfaces.HardwareSvc.HwProtocalTypeEnum.CAN
|| (ETStudio.SSF.Interfaces.HardwareSvc.HwProtocalTypeEnum)pChannelMapping.ProtocalType == ETStudio.SSF.Interfaces.HardwareSvc.HwProtocalTypeEnum.CANFD)
{
//TODO: Add Channel Mapping
}
}
else
{
if ((ETStudio.SSF.Interfaces.HardwareSvc.HwProtocalTypeEnum)pChannelMapping.ProtocalType == ETStudio.SSF.Interfaces.HardwareSvc.HwProtocalTypeEnum.CAN
|| (ETStudio.SSF.Interfaces.HardwareSvc.HwProtocalTypeEnum)pChannelMapping.ProtocalType == ETStudio.SSF.Interfaces.HardwareSvc.HwProtocalTypeEnum.CANFD)
{
//TODO: Remove Channel Mapping
}
}
}
- 请在此处补充您的其他接口需求
6.工程文档管理
创建上位机项目时,将要求用户选择一个空目录作为项目目录,并在此目录中存储'ETStudio.ets'项目文件。同时,与项目相关的所有文件(如A2L文件、ECU解密DLL文件等)都应放在此目录中
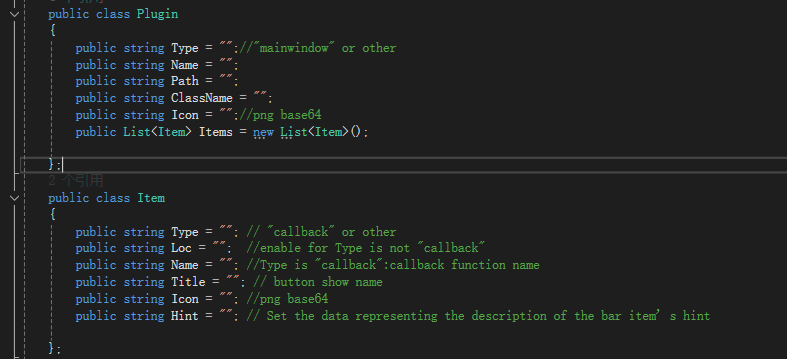
7.plugins.json结构介绍
####数据结构图
####plugins.json结构图
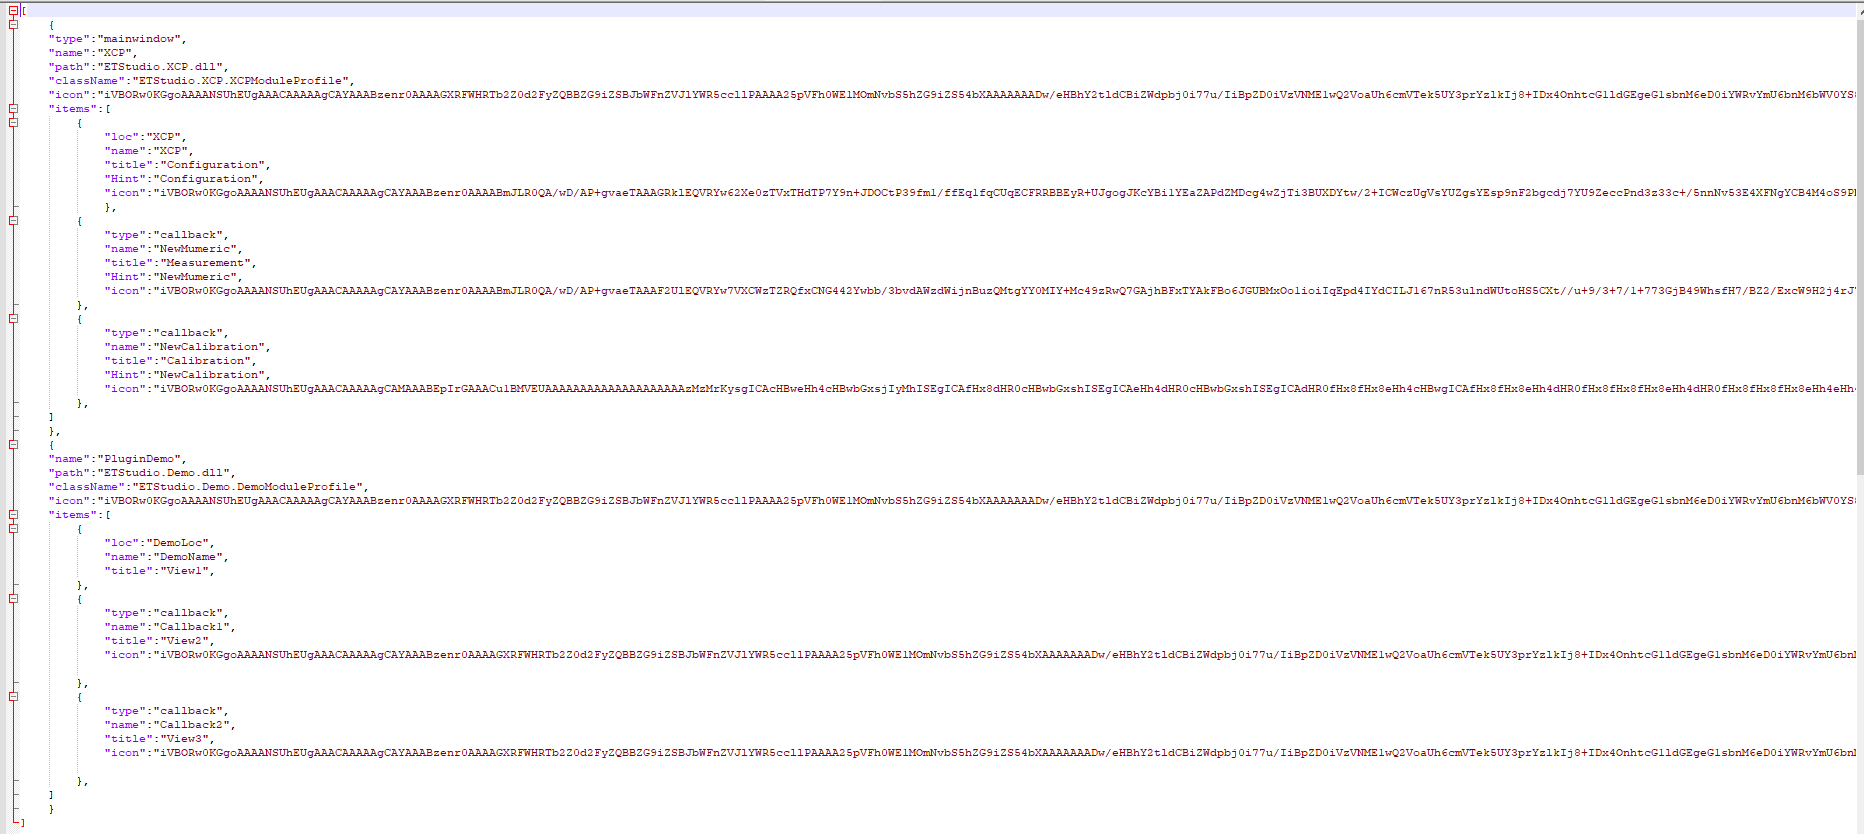
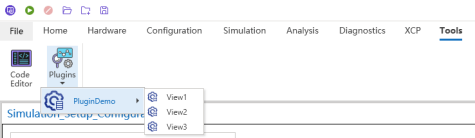
在上述文件中配置两种类型的显示插件:
- 集成在主界面上方(XCP)并以大图标形式显示。
- 集成到工具→插件演示中。
####表1 插件参数分析
| 参数 | 分析 |
|---|---|
| Type | 可以是'mainwindow'或任何其他字符串或省略: 1. 当且仅当为'mainwindow'时,以大图标形式显示在界面上方。 2. 其他情况将显示在工具→插件中。 |
| Name | 图标名称,如XCP和插件演示。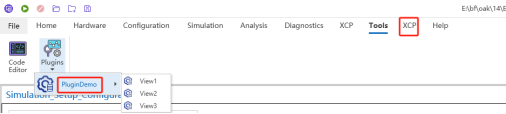 |
| Path | DLL具体路径。 |
| ClassName | 调用的类名。 |
| Icon | 仅支持PNG格式的Base64数据。请删除前缀'data:image/png;base64,'并保留'iVBORw0KGgoAAA...'。当为空时,使用默认图标。 |
| Items | 需要集成的功能按钮列表。 |

####表2: Items参数分析
| 参数 | 分析 |
|---|---|
| Type | 可以是'callback'或任何其他字符串或省略: 1. 当为'callback'时,调用表1中className的name方法。 2. 其他情况下,将根据后续配置创建接口 |
| LOC | 当type不是'callback'时启用,结合name创建接口。 |
| Name | 当type为'callback'时,调用表1中className的name方法。 当type为其他时,将根据后续配置创建接口 |
| Title | 显示按钮名称。 |
| Hint | 鼠标悬停显示信息。 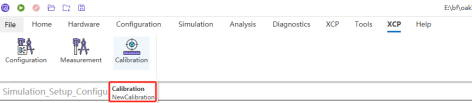 |
| Icon | 仅支持PNG格式的Base64数据。请删除前缀'data:image/png;base64,'并保留'iVBORw0KGgoAAA...'。当为空时,使用默认图标。 |
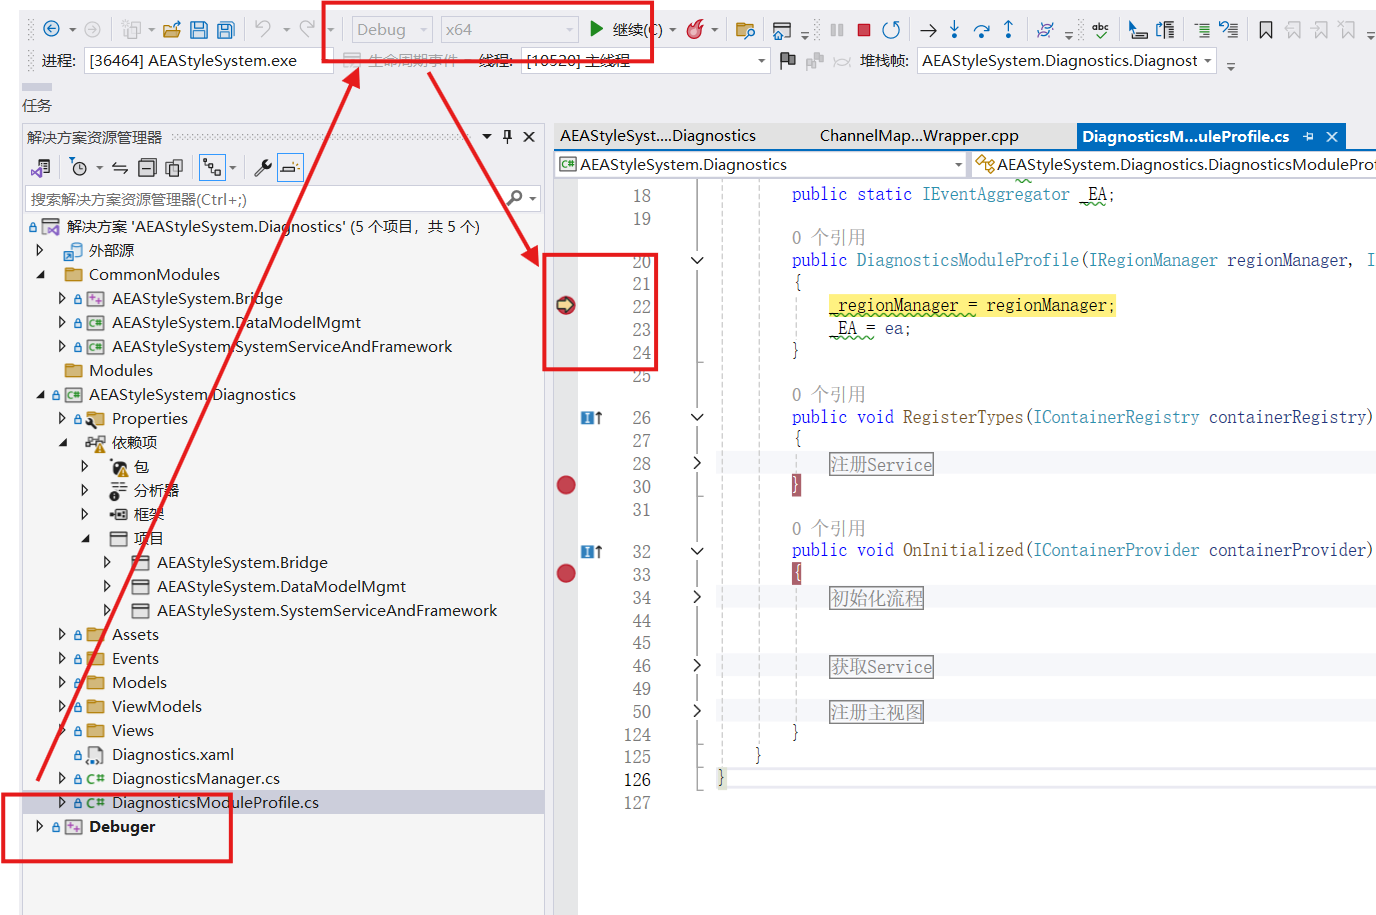
###8.Profile文件结构介绍
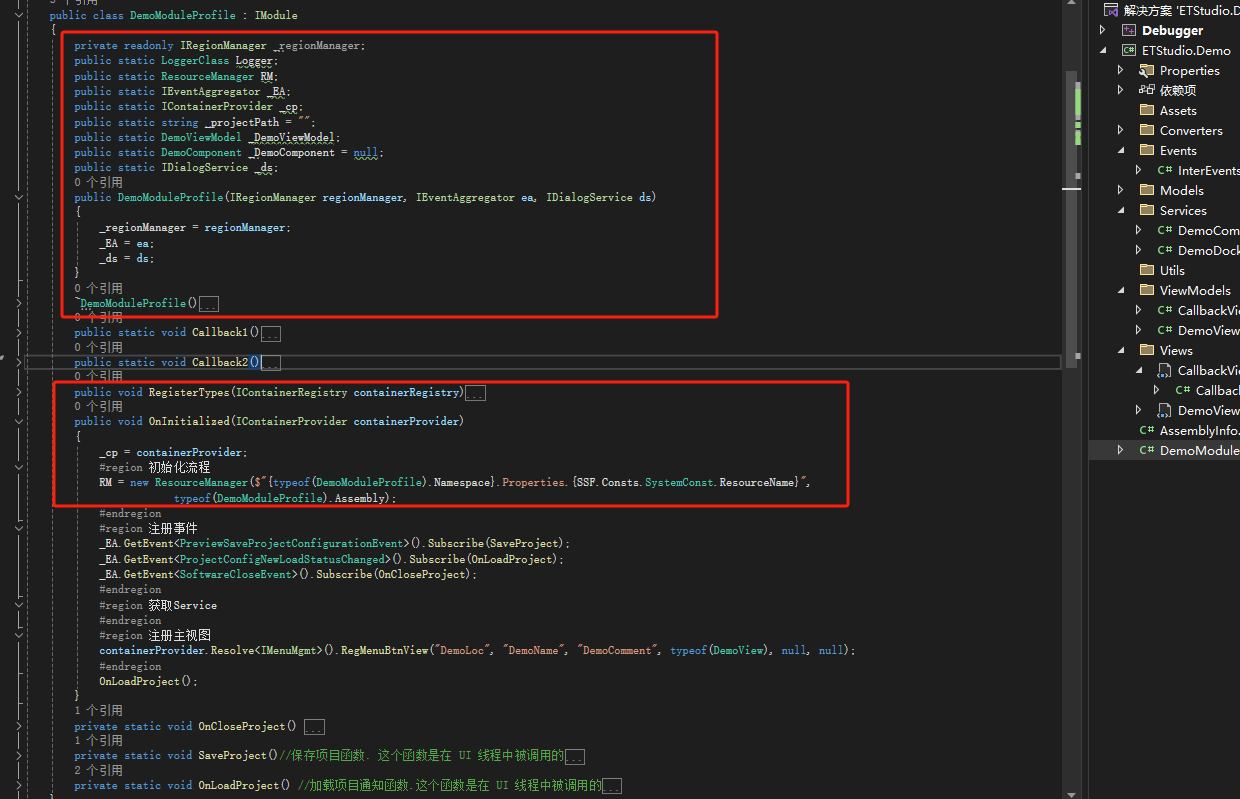
红框可以看作是固定写法,'IModule'接口来自'Prism.Modularity'。
-通过CallBack调用方法:将方法修饰符改为'public static',类似于'VNet 1'和'VNet 2'的示例。 -显示界面并交给上位机管理:参考OnInitialize中注册主视图的代码:
containerProvider.Resolve<IMenuMgmt>().RegMenuBtnView("DemoLoc", "DemoName", "DemoComment", typeof(DemoView), null, null);
-要订阅事件,请参考OnInitialize中注册的事件代码 PreviewSaveProjectConfigurationEvent: 项目文件保存事件 ProjectConfig NewLoadStatus Changed: 项目文件切换事件 SoftwareCloseEvent: 上位机关闭事件
-详情请参考Demo项目