Node Overview
In ETStudio's simulation configuration, a Node represents a virtual ECU attached to a particular bus. Multiple Nodes share the same Bus and communicate by sending and receiving messages, thereby simulating the behavior of the entire network without requiring real hardware.
Each Node typically corresponds to an electronic control unit in a real vehicle, for example:
- BCM (Body Control Module)
- EMS (Engine Management System)
- TCU (Transmission Control Unit)
- IPK (Instrument Cluster)
This chapter describes how to create, configure, and manage Nodes.
Node Configuration
Methods to Add a Node
- Directly import a
.dbcor.ldffile, right-click the file and selectNode Synchronization, then move the available nodes from the left side to the right side as needed. The defined Nodes will be generated automatically.
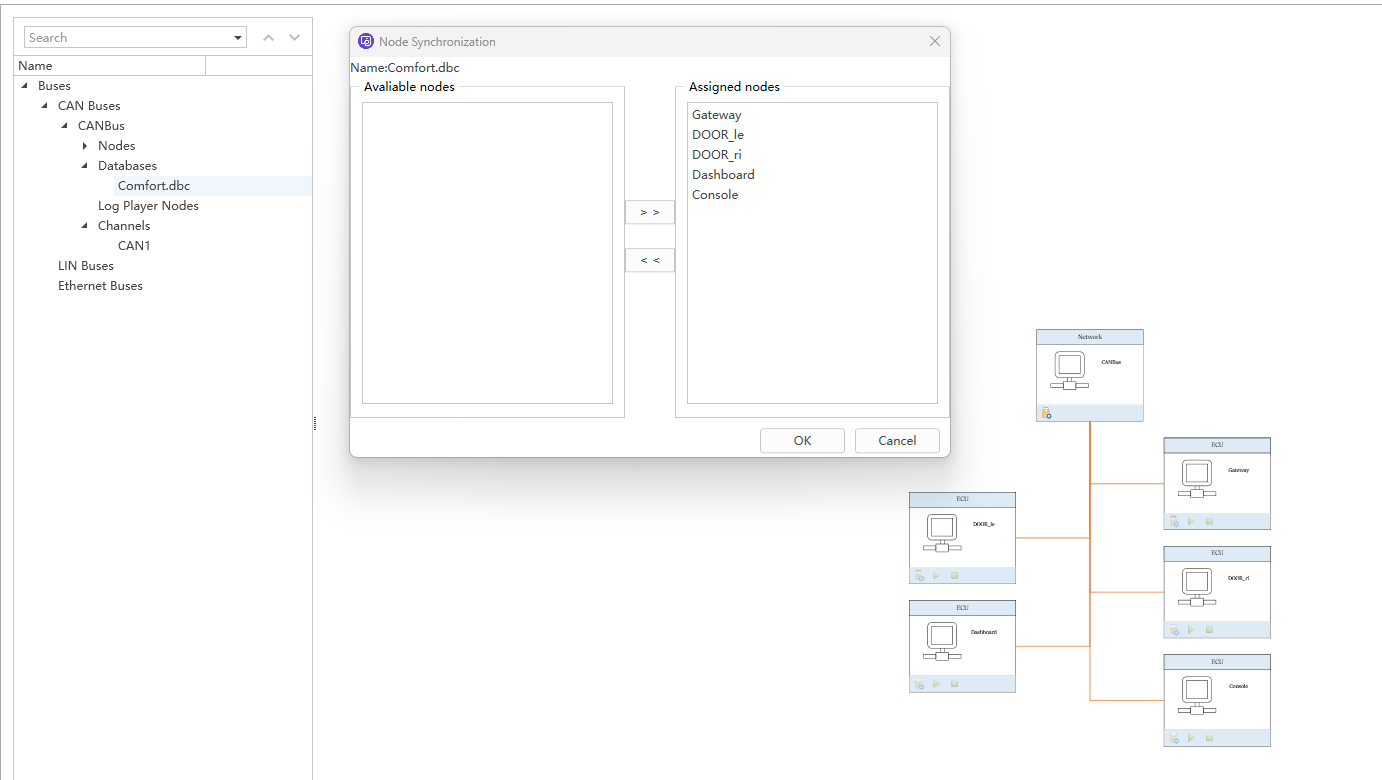
- Right-click
Nodesand selectInsert Nodeto add a custom node.
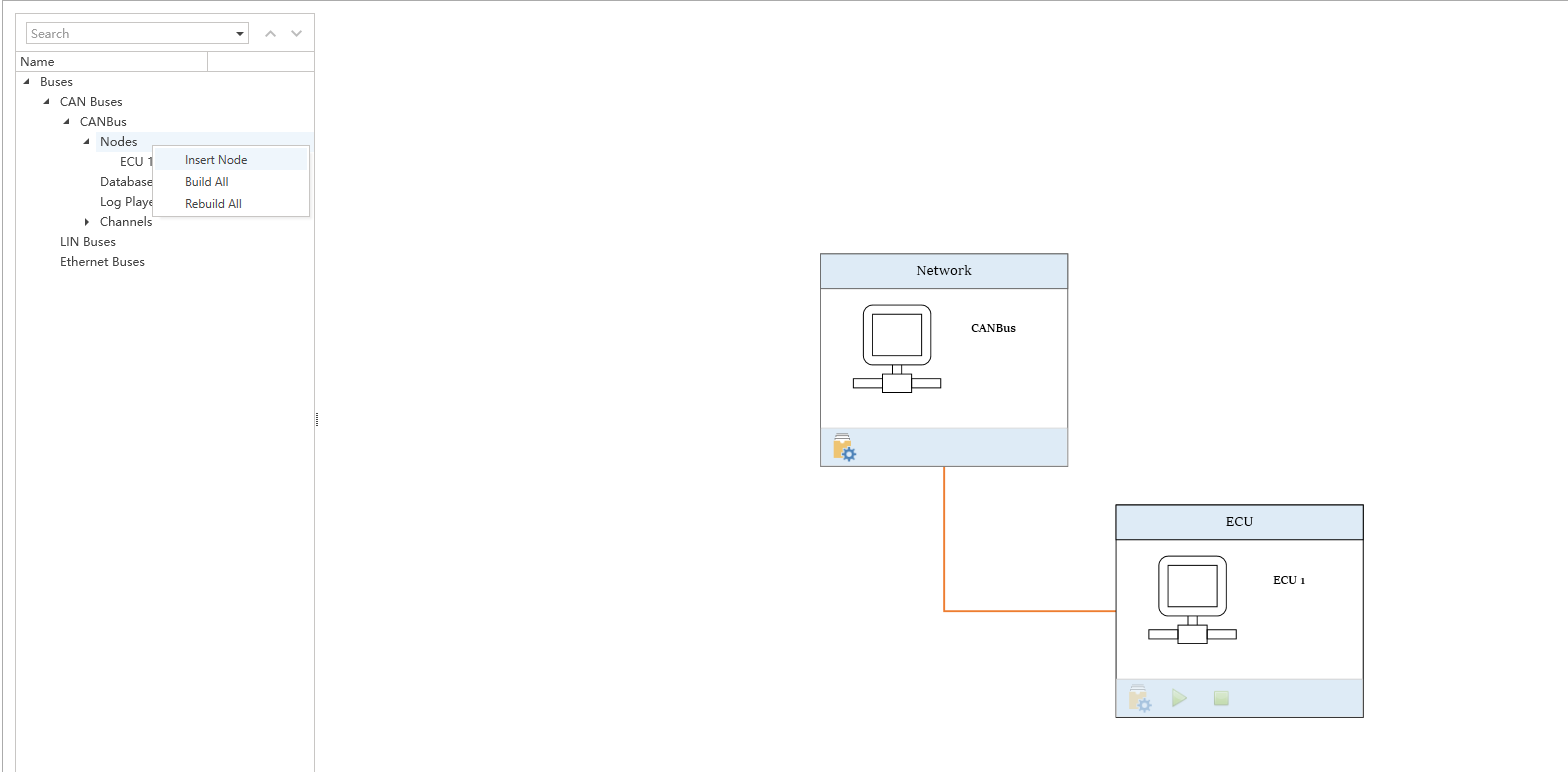
Note: You can zoom in or out of the Node view by holding down the Ctrl key and scrolling the mouse wheel.
Methods to Compile Nodes
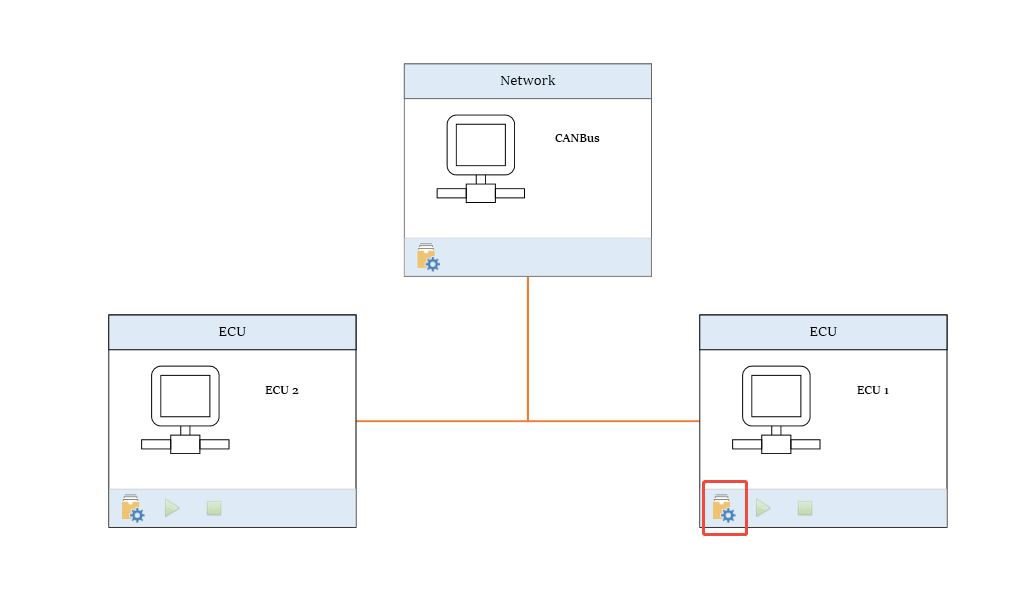
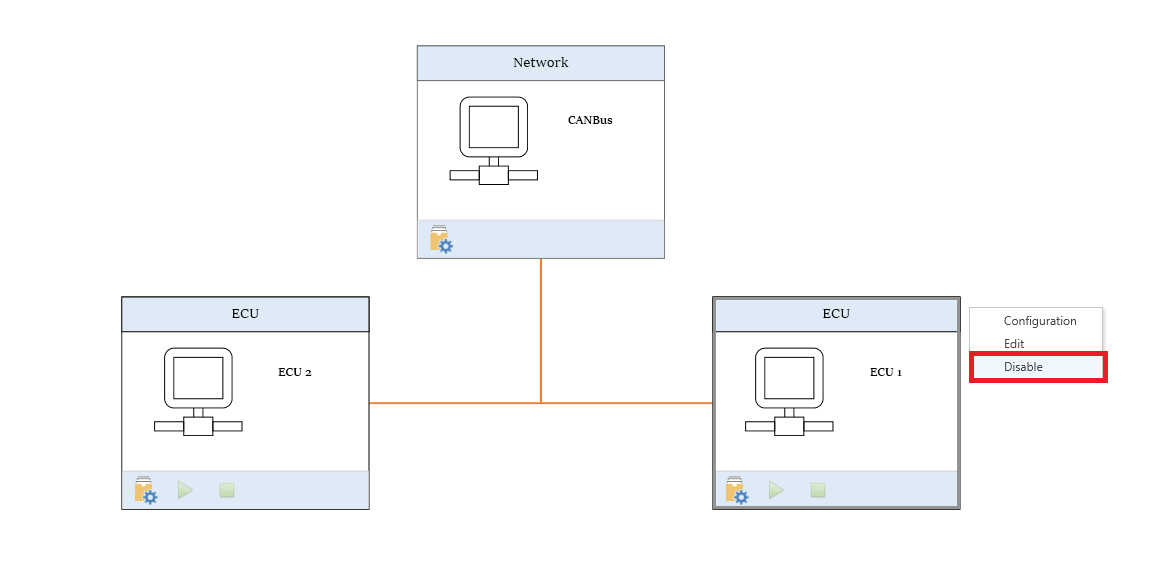
Click the button at the bottom-left of the ECU to compile a single node.
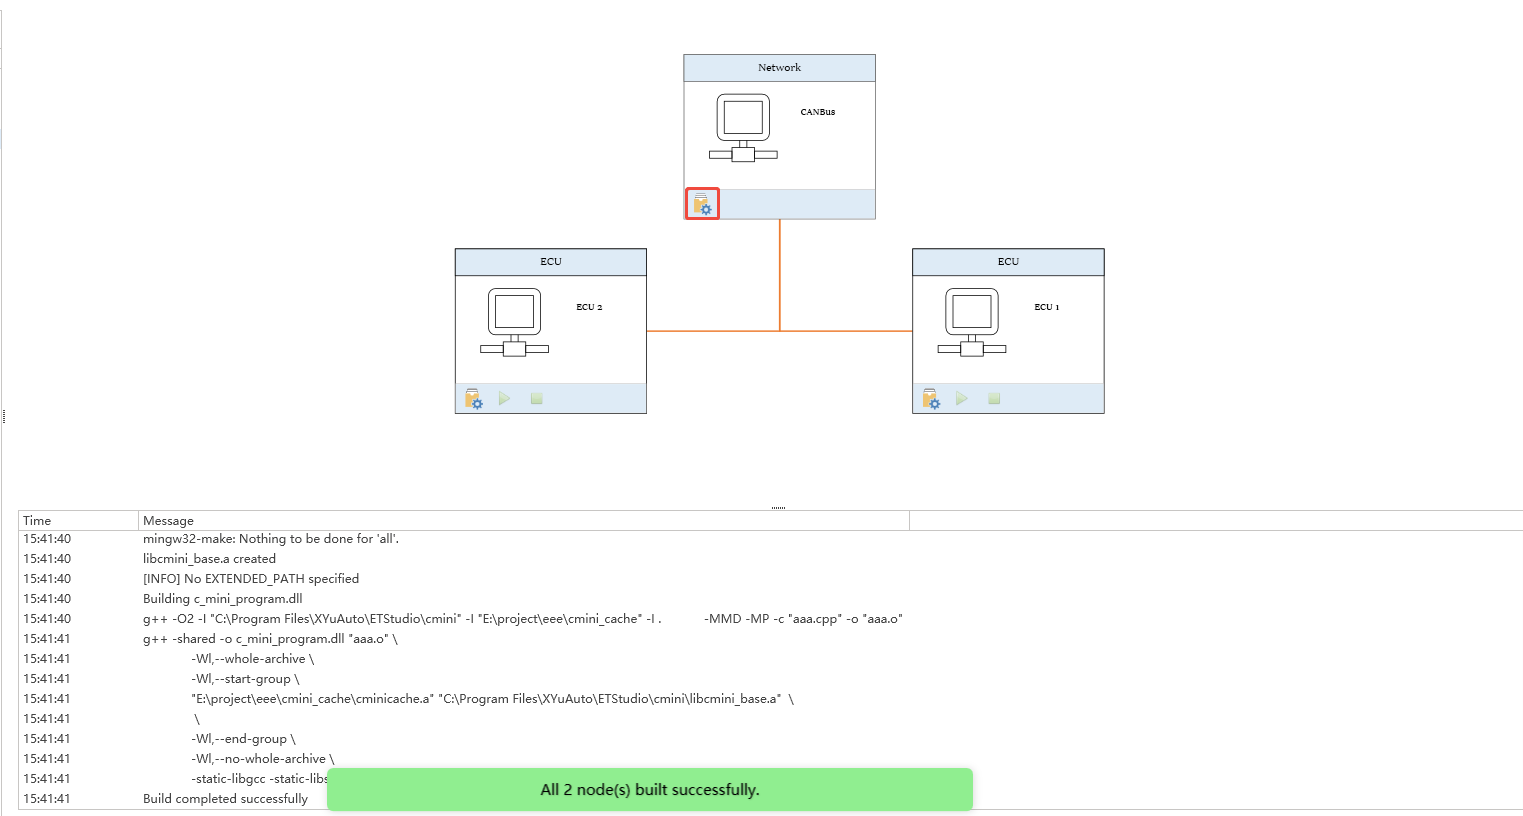
Click the button shown in the figure below, or right-click Nodes and select Build All, to compile all nodes on this bus.
If you want to skip a particular node when compiling all nodes, you can right-click the ECU and select Disable.
Online Replay Node
Right-click Logplayer and choose Insert Replay Block CAN. In the Replay Block, right-click and select Configuration to configure online replay.
Replay Configuration includes the following sections:
General
Used to configure the basic information of the replay block.
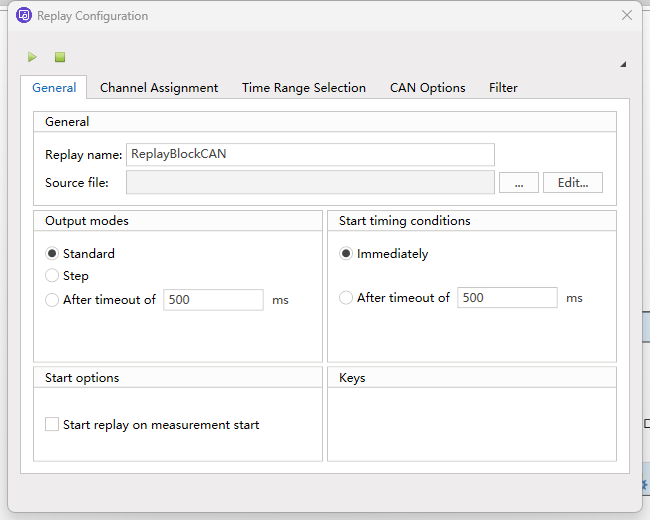
| Area | Button | Description |
|---|---|---|
| General | Source file | Import a .asc or .blf file |
| Output modes | Standard Step After timeout of | Standard replay mode Replay step by step according to count Start replay after a certain delay |
| Start timing conditions | Immediately After timeout of | Start replay immediately Start replay after a certain delay |
| Start options | Start replay on measurement start | When checked, online replay starts automatically as soon as the host software starts |
Channel Assignment
Used to select the CAN channels that participate in the replay.
Operation steps:
- Select the target channel in the channel list.
As in original— initialize the settingsIgnore all— ignore all configurations
Time Range Selection
Used to select the time range within the replay file.
| Parameter | Description |
|---|---|
| Start of log source | Start time of the source file (unit: seconds) |
| End of log source | End time of the source file (unit: seconds) |
| Selection start | Replay start time (unit: seconds) |
| Selection end | Replay end time (unit: seconds) |
CAN Options
Used to configure CAN bus parameters.
- Tx message: When checked, only transmitted messages are displayed
- Rx message: When checked, only received messages are displayed
Filter
Used to filter the replayed messages.
- Filter by ID
- Filter by message name
- Filter by ID range