Diagnostics Service Configuration
This module encompasses three primary functional areas: Basic Diagnostic Services, Combined Services, and DID & DTC Management. The intuitive interface provides complete control over all diagnostic operations, as illustrated below:
Add/Delete Service Commands
Place the mouse over the service command where you want to add or delete, right-click to expand, and select whether to add or remove the service, as shown in the figure below:

Configure BasicDiagnostic Service
Session Control Configuration Example
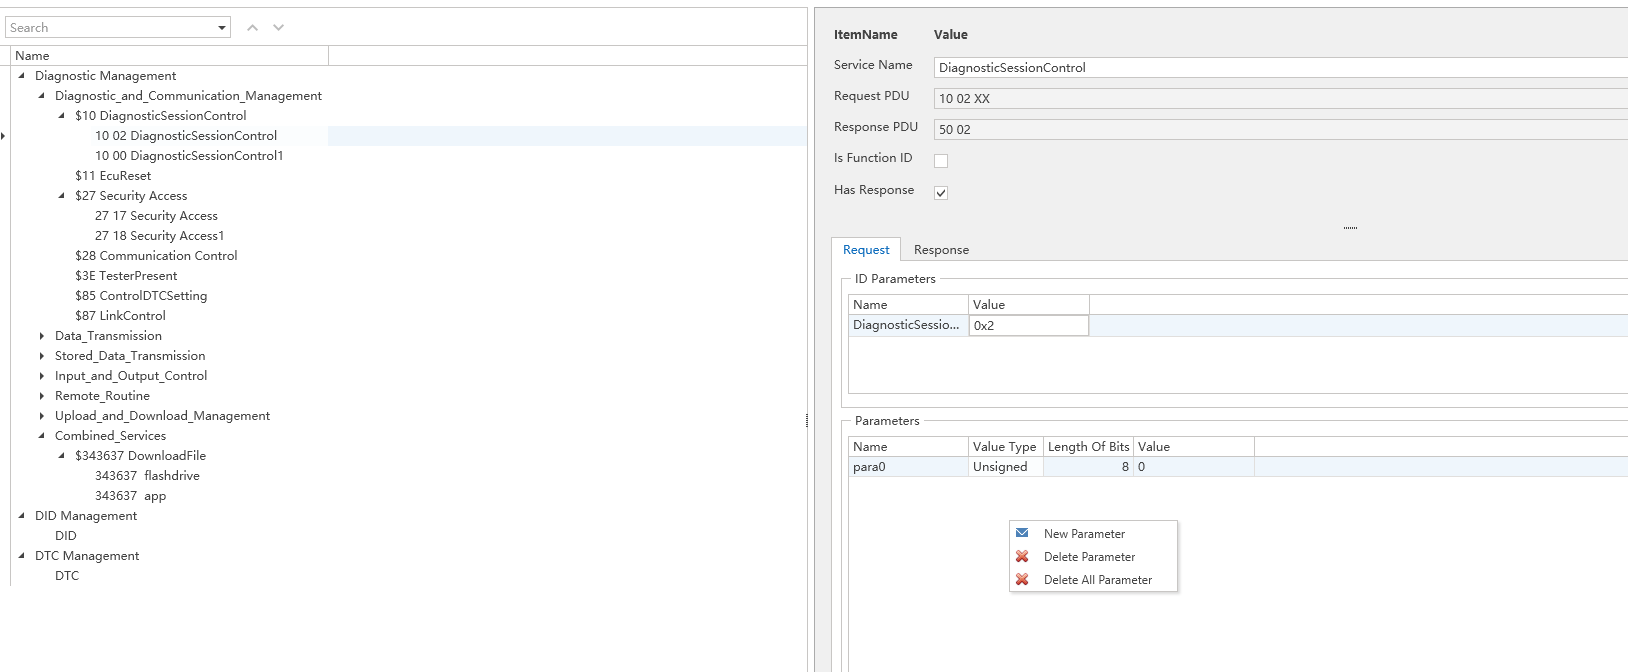
The configuration panel for basic diagnostic services includes these essential parameters:
Key Configuration Elements:
-
Custom Service Name
Assign a clear, descriptive name for easy identification and management
-
Functional ID Option
Enable this setting when using Functional Addressing for diagnostic requests
-
Sub-Function ID
-
Parameter List Configuration
Supports additional diagnostic parameters beyond Service ID and Sub-Function
Includes separate configuration for request and response frames
Flexible parameter management with add/delete functionality
-
Parameter List: in addition to the diagnostic ID and Sub Function ID, the diagnostic service can also send parameters to the target ECU. The parameter list includes the parameter list for both request and response frames. The configuration method is shown below, where users can choose to add/delete various types of parameters.
Important Notes:
Service ID and Sub-Service Type ID are mandatory fields (e.g., DiagnosticSessionType in Session Control)
Additional parameters are optional based on diagnostic requirements
Real-Time Message Preview
The interface displays dynamically generated diagnostic messages reflecting current configurations:
Outgoing Request: 10 02 xx xx xx (where xx represents user-defined variable parameters)
Expected Response: 50 02 xx
Diagnostic Service Parameters
The diagnostic module parameters support seven types of data types, including: Unsigned��signed�� Single��Double��Hex��Ascii
-
Unsigned: unsigned Integer, its data length must be less than 32 bits and a multiple of 8, and can be 8, 16, 24, 32 bits.
-
signed: signed Integer, its data length must be less than 32 bits and a multiple of 8, and can be 8, 16, 24, 32 bits.
-
Single: single-precision floating-point number, with a fixed data length of 32 bits. Users directly input and output floating-point data.
-
Double: Double-precision floating-point number, with a fixed data length of 64 bits. Users directly input and output floating-point data.
-
Hex: A hexadecimal array, where the data length must be a multiple of 8. The input data must conform to hexadecimal data types.
-
ASCII: ASCII string, with a data length that is a multiple of 8. The input data is an array of ASCII characters, which is then converted into hexadecimal for transmission.
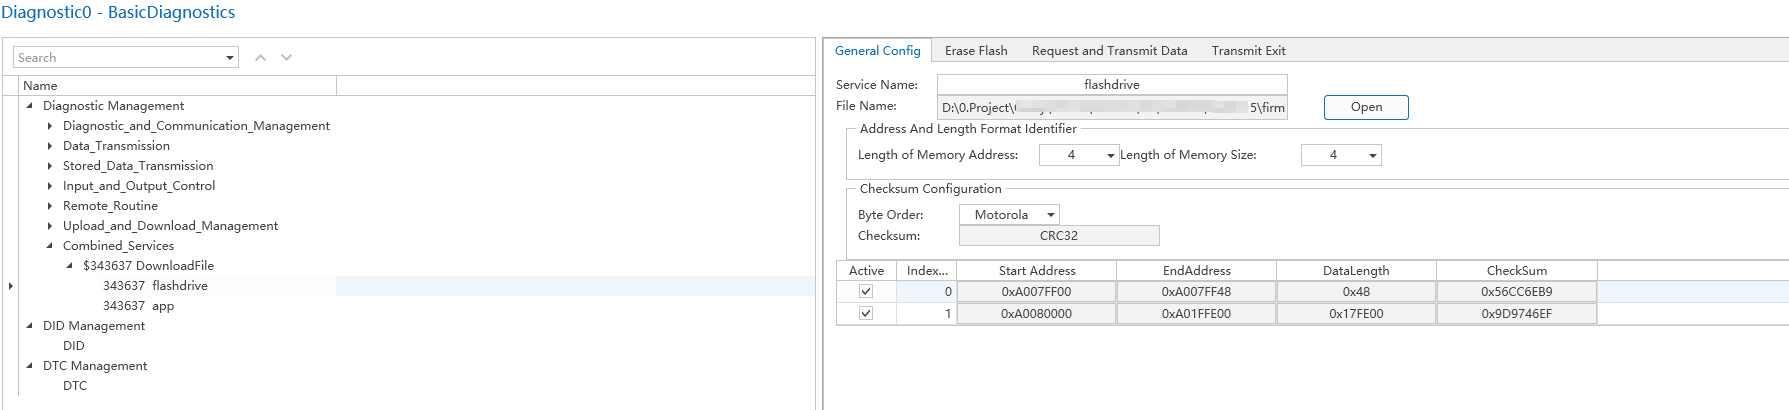
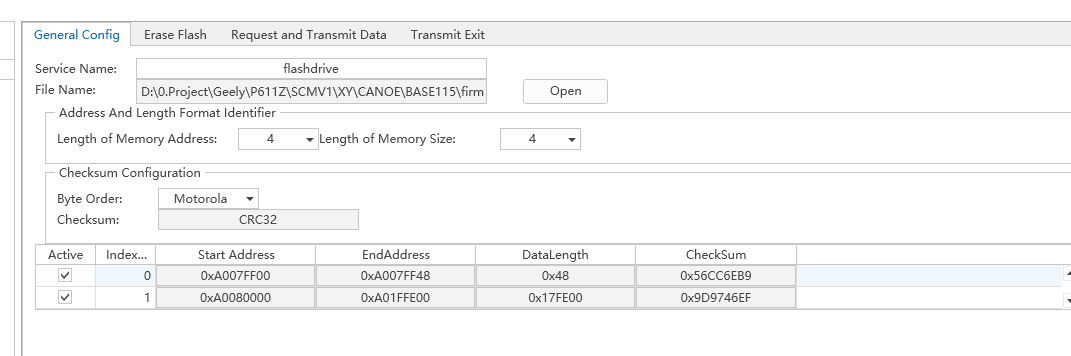
Configure CombinedServices Message
Download File
Combined services currently only support the download file service.
-
Configure the name of the service.
-
Select the file for CRC verification. Detailed introduction to CRC verification will be provided in the subsequent chapters.
-
Load the executable file. ETStudio supports the loading of VBF, S19, and bin files. After loading, the sections, addresses, lengths, and other information contained in the file can be seen at the bottom of the interface.
-
Delete the executable file.
-
Select the parameter type for the TransferExit (0x37) command.
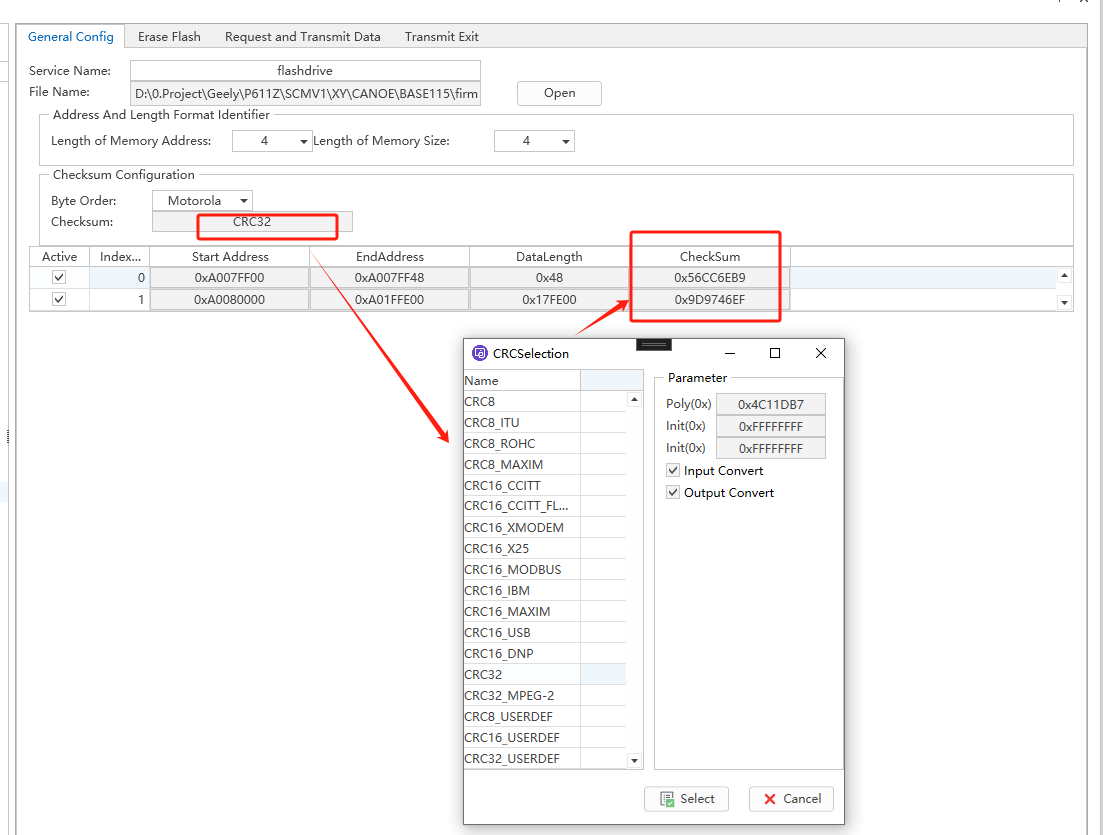
Checksum
During the program download process, to ensure the integrity of the data, a Checksum algorithm is required to verify the completeness and validity of the data. In the ETStudio diagnostic module's compliance services, the mainstream CRC algorithm is utilized for verification. The selection box for this is shown in the figure below:
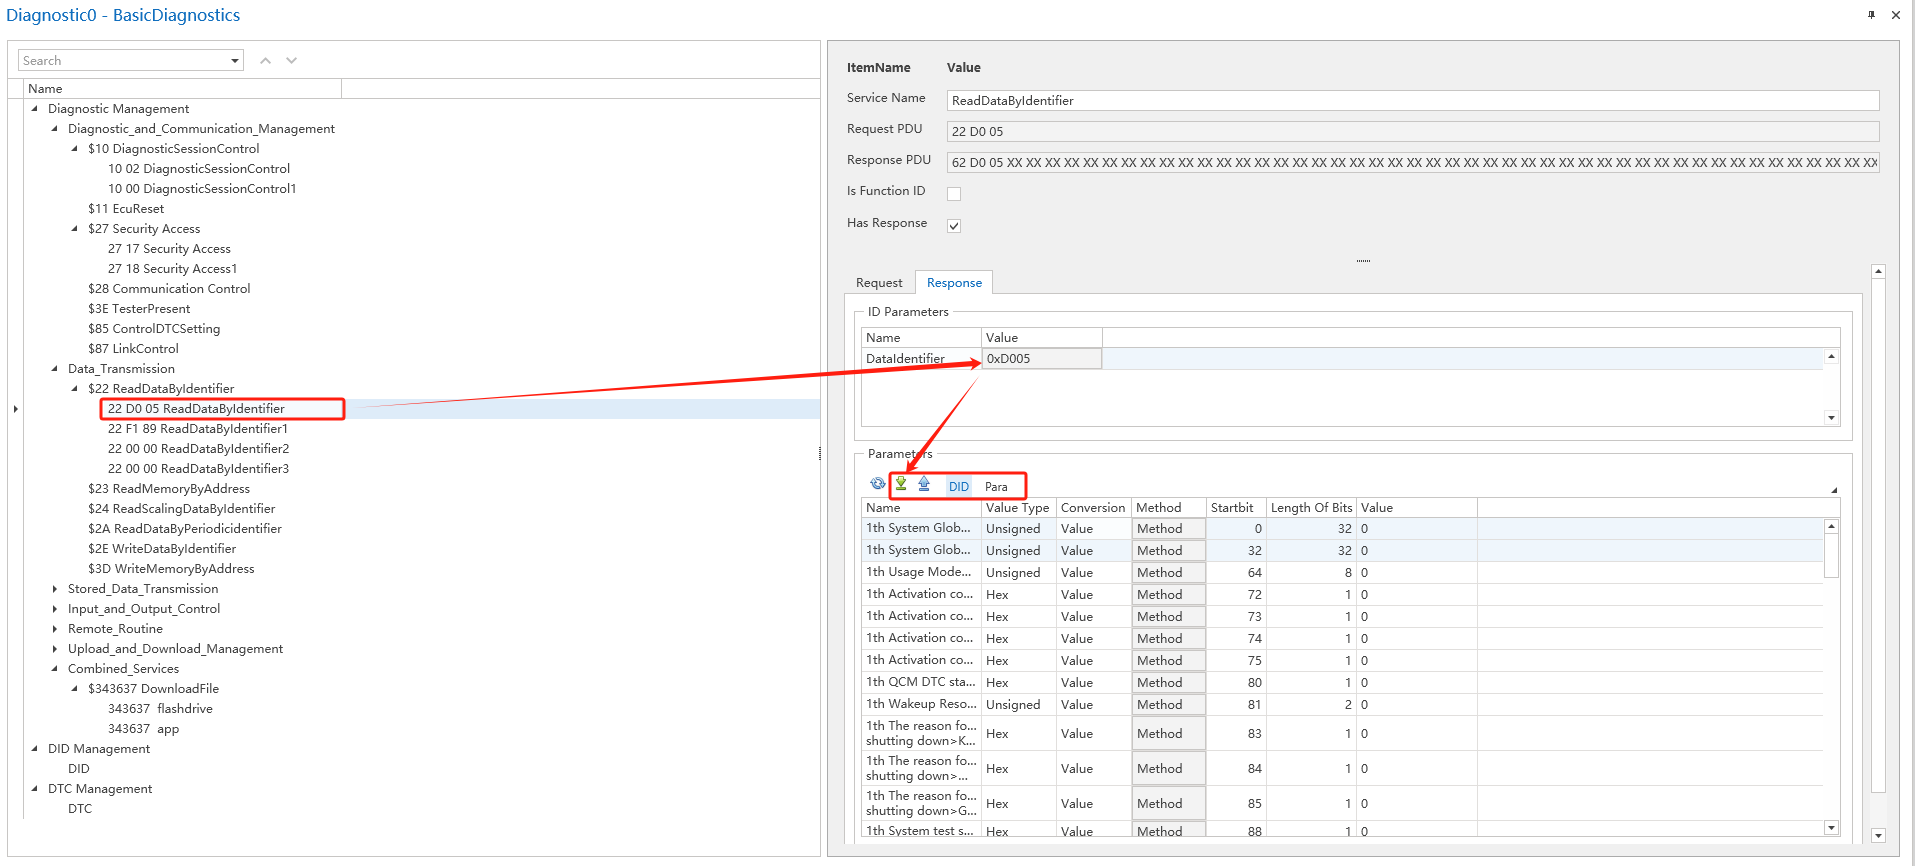
DID Management
Supports importing and exporting DID information in Excel format ,The right-click menu includes Add, Delete, and Delete All, On the right interface, DID related information can be entered .
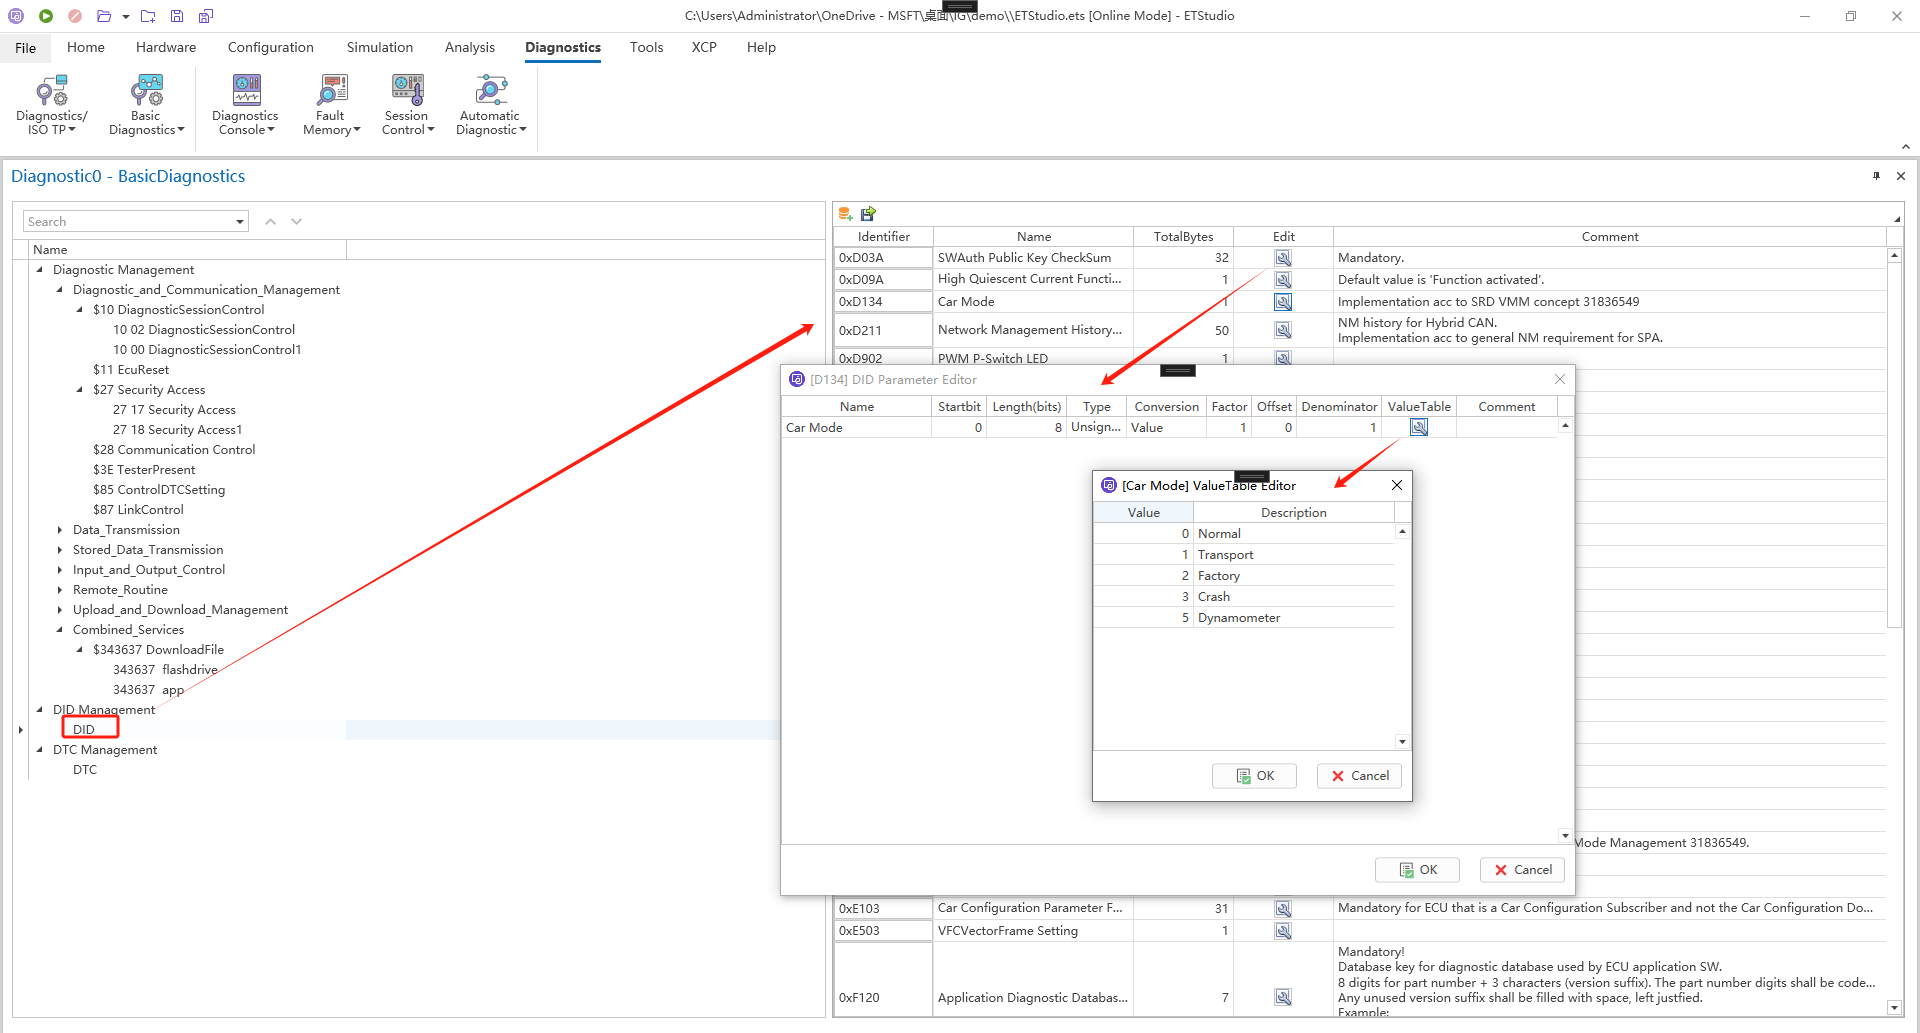
This feature will be used in the Response of the $22ReadDataByIdentifier above If DataIdentifier exists in DID Management, click the Download button to synchronize the configured parameters to the current Service, If you need to update DID Management data, simply click the upload button, If using the format in DID Management for parsing, select DID. If using the Parameters parsing in the current interface, select Para
DTC Management
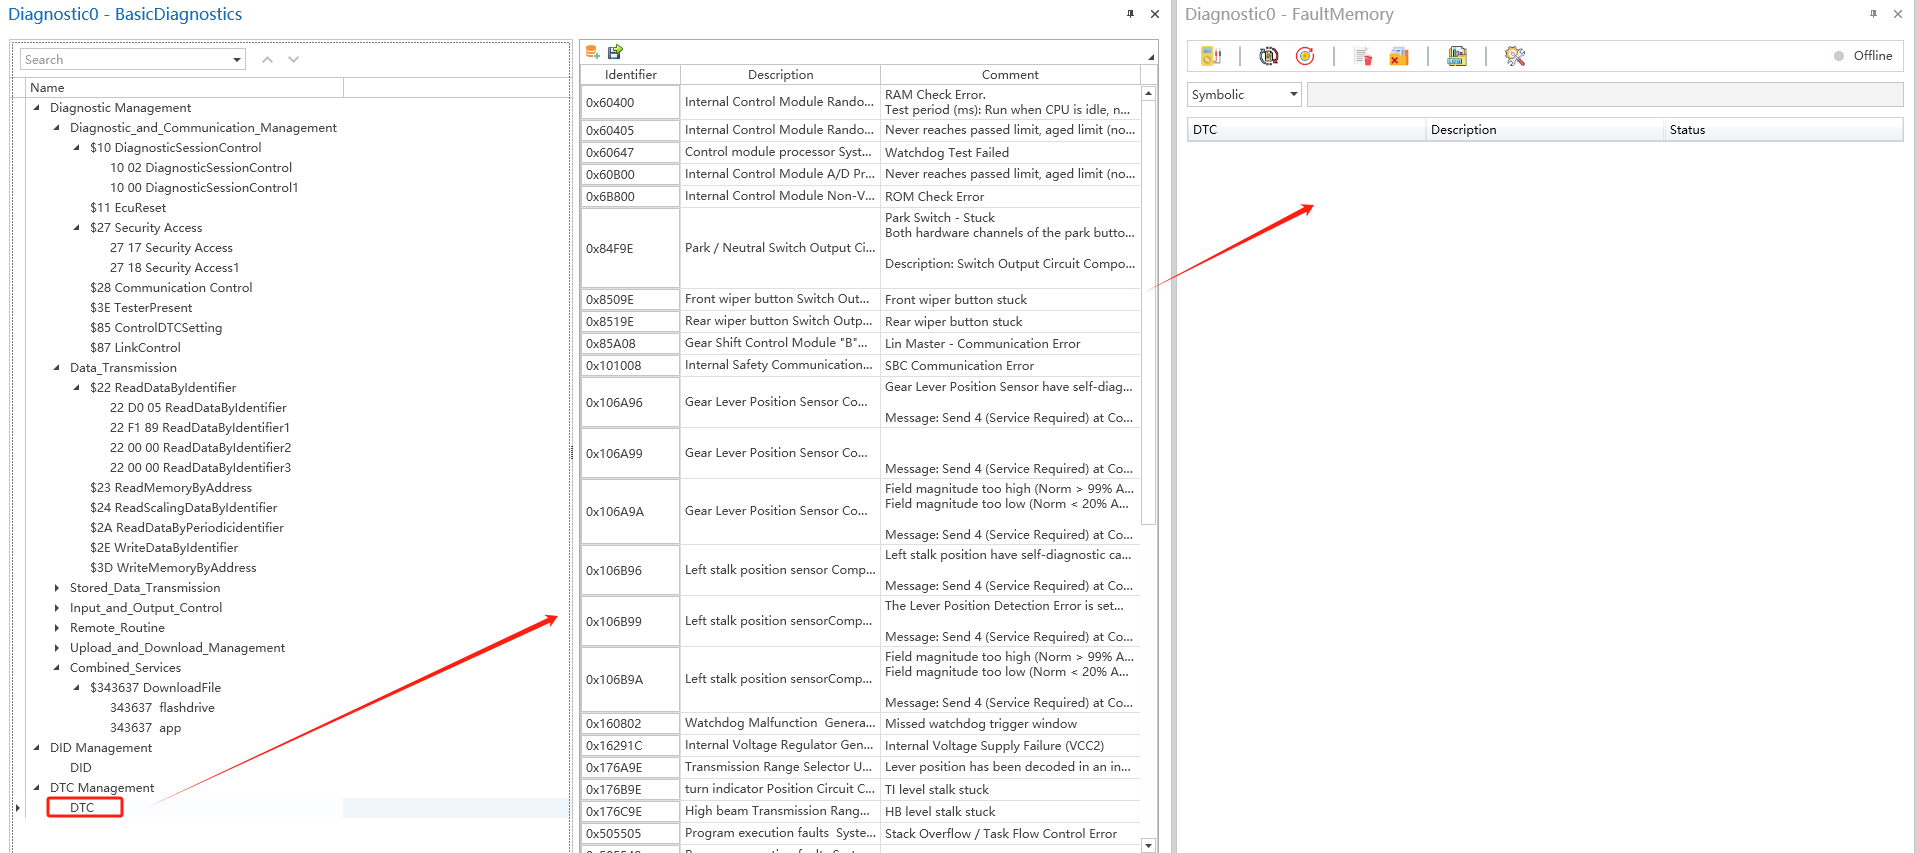
Supports importing and exporting DTC information in Excel format The right-click menu includes Add, Delete, and Delete All. On the right interface, the DTC ID, description information, and remarks can be entered. After successful entry, the entered DTC information can be used in the Falut Memory module